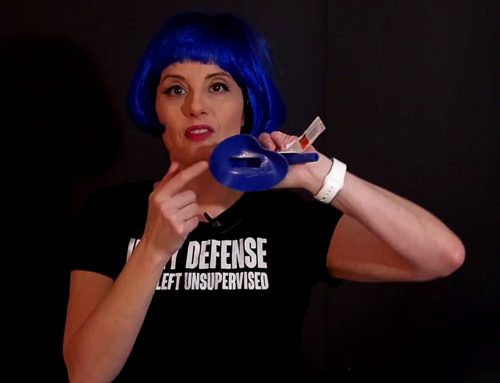
The She-P is a silicone device designed to help women urinate into the water while wearing drysuits without resorting to diapers. Invented and manufactured by Heleen, it is also known as a female external catheter. Heleen recently introduced a redesigned She-P with excellent new features based on feedback from her customers.
Three years ago, after over a year of trial and error (mostly error) and days of reading internet forums, I wrote a tip sheet for a frustrated friend to condense what I had learned about using the She-P. Soon, she had her first successful dive with the device. Since then, my guide has been handed out by the scuba shop where I work parttime with good feedback and success, so I wanted to share this with a larger audience. Laura James has also published excellent videos (one and two) on how to use the device.
Note, this article is for what you do after you have all your linkages in place since there are many good resources for how to set up the device.
As we all know, hydration is critical to avoiding decompression illness. For example, the Dive Safety Officer of the New England Aquarium posted an account of his serious bout with dehydration-related DCI a few years ago in his blog. Plus, in an often uncomfortable sport, any opportunity to increase comfort and alleviate significant distraction (“OMG, I really need to pee!”) is welcome.
So, let’s get started! This will necessarily be somewhat risqué, given the subject matter.

She-P 3.0 (left) and She-P Classic (right). Photo by Julie Cerrato
SITE PREP
- Shaving is OK.
- Some swear by waxing. Others, not so much.
- Remove any moisturizers or anything greasy on your skin; ivory soap and alcohol prep pads work well for this in a sort of reverse Silence of the Lambs.
- The device still works with stubble, but it will feel like waxing when you remove it.
DEVICE PREP
- Keep everything as clean as possible to avoid urinary tract infections.
- Use gloves to keep your device clean and to keep the glue off your hands.
- I made a homebrew stand to prop up the device while the glue is setting, made with a hairspray shield, waxed paper, and paper towels. This reduces the amount of glue that drips over the edges of the device.
- For extra security, use two or more layers of glue. Apply the first layer on your She-P the night before diving.
- In the morning, or at least 20 minutes later, add a second layer of glue, leaving enough time for it to get tacky. This will take at least five minutes or longer, depending on the temperature and humidity.
- One good layer of glue also works if you are only doing one dive.
- If it’s an important dive, a long dive day, or a long and more physically demanding dive, use two or more layers of glue for extra insurance.Both the Hollister spray glue and Urobond glue work well. I personally find the Hollister spray easier to apply since I am clumsy with the Urobond brush. If you use the spray glue, use a Q-tip or the edge of a paper towel to get the glue spider-webbing out of the device’s reservoir opening. If you use the Urobond, be sure to keep the jar lid threads free of glue and cap tightly; if there is a gap for evaporation, the glue may harden.
Based on my experience, here are a couple of considerations. First, avoid applying glue to the She-P immediately adjacent to the reservoir opening. Leave a small glue-free zone around the opening. (Fig. 1) Try to get the glue towards the edge of the sealing surface without slopping too much over the side, and then blot up any drips going over the edge. This helps to avoid getting your labia minora stuck in the glue which is painful and may cause injury if you wear the device for an overly extended period of time.
Second, avoid excessive glue along the outer edges of the device. This can cause it to stick to itself where the edge and the outer side of the reservoir meet. This can ruin the seal and cause a major leak when you are wearing it. The device will adhere to itself harder than it will stick to your skin.

Fig. 1 Leave a small glue-free ring around the opening when prepping the device.
DRYSUIT PREP
- Be sure your suit has a p-valve. This won’t work without one! Your local dive shop should be able to install a p-valve if your suit needs one.
- Try using a few strips of waterproof medical tape to secure the front part of the She-P. I had the most leaks there at first.
- Use a diaper or heavy maxi- pad at first while you gain experience. Cutting a longitu- dinal slit in the front half of the pad will help fit it around the She-P hose. Eventually, you can do away with these uncomfortable things when you are confident in your seal.
- Try using underwear with an “H fly” to keep the tube upright and not flopping around like some sort of demented mini-elephant. A lot of jostling or physical activity can cause parts of the device to un-stick from your skin.
- Test your connections and hoses by hooking it all up and running water through the system.
DONNING
- Use gloves.
- How I place it is too gross for words, really. Suffice it to say the procedure involves a mirror and squatting to get that first critical placement onto the perineum correct, then sort of cupping everything together while carefully standing up, legs apart, and sticking the She-P on all the way.
- Have your clothes and gear within easy reach; bending way over from the waist to pick things up off the ground can unstick the back part of the She-P. One way to pick things up is to put one knee down.
- Try this all at home in the shower first.
- Away from home, the donning maneuver is the same. Be sure your hands and the device stay clean, for example, by transporting your prepped device in a mask box. It is tricky but possible to do this while wearing a boat coat.
- Once the device is adhered, stand still while holding it in place for a little while. If there’s something wrong, you can peel and re-stick, but with two or more layers of glue, this can get rough.
- Pressing gently on the reservoir portion of the device can alert you to leaks, if you feel any puffs of air where they should not be.
- Try using a few strips of waterproof medical tape to secure the front part of the She-P. I had the most leaks there at first.
- Use a diaper or heavy maxi-pad at first while you gain experience. Cutting a longitudinal slit in the front half of the pad will help fit it around the She-P hose. Eventually, you can do away with these uncomfortable things when you are confident in your seal.
- Try using underwear with an “H fly” to keep the tube upright and not flopping around like some sort of demented mini-elephant. A lot of jostling or physical activity can cause parts of the device to un-stick from your skin.
- Don your drysuit undergarments carefully so you don’t unstick the She-P.
- If the device gets partially unstuck, some judicious pressing may help re-stick it. Do not do this around children or easily offended adults 😉
I highly recommend viewing Laura James’ videos on device placement; she uses anatomical models to illustrate where the device sits when placed correctly.
USE
- Make sure the drysuit’s p-valve is open. You can open it during the dive as well, usually if you are feeling some back-pressure. Warning: excessive back-pressure may cause a blowout.
- Let out a tiny bit of urine to test your connections. The diaper or maxi-pad will help you if there is a leak.
- Maintaining a horizontal position in the water to test or use the device works better than fighting gravity in an upright position. Another reason to have good trim!
Many p-valves are balanced so, in theory, using the device at depth should be no more effort than using it at the surface. If you have an unbalanced p-valve, be sure to “prime” the system before you descend. In any case, try not to force out a big stream, since the back-pressure of clearing the tube’s air and opening the check valve may cause a leak. If you can gently void your bladder while float- ing on the surface of the water, a stream of bubbles coming from your p-valve as the air is cleared out is a sign that you have a good seal (and that you have your p-valve open).
POST-DIVE: DISCONNECTING
- Once you have the top half of your drysuit opened, disconnect the She-P from the suit tube.
- Squirt some disinfectant such as Betadine – or at the very least clean water – through the suit tube and out through the valve on the suit. This helps keep the valve clear for your next dive and keeps the tube clean for your next dive. Note: there is no check valve between the p-valve tube and the She-P tube, so keep it clean.
- Making sure the She-P tube extends out past your drysuit zipper, give the device’s reservoir a small squeeze to get excess urine out while you are still wearing the bottom half of the drysuit. It will end up on your suit and can be easily rinsed off.
- Alternatively, use the She-P kit’s tube cap to close the device. This only works if you have installed the quick-disconnect on the She-P itself and not the suit hose.
- Blow a puff of air through the drysuit hose to clear out the water and disinfectant.
DEVICE REMOVAL AND CLEANING
- Get your gloves on so you don’t get glue all over your hands, not to mention the remover chemicals can be drying.
- Peel your She-P off carefully. It’s OK if you can’t clean it right away. Disinfect or rinse as best as you can as soon as possible.
- Get some glue-remover on yourself; both the Hollister remover wipes and the Smith-Nephew Uni-Solve wipes work well. Follow up with the oilier ConvaTec AllKare wipes on the personal side to keep yourself from sticking to yourself.
- If you like a more natural approach, mineral oil or cocoa oil can also help remove the glue from yourself; this can be even more tedious, however.
- Rinse the device with soap and water or another disinfectant.
- Start wiping the glue off the She-P with the remover wipes. I go through a lot of these sometimes, and it takes some time and effort to get the device clean. Laura James’ video is helpful here too, as well as her newer video about using a couple of wipes and a plastic bag. Please see her video to learn more.
- Do not try to be all clever and use original-style orange Goo- Gone to remove the glue from the device. Goo-Gone works well and fast to remove the glue, but that’s where its usefulness ends for the She-P. Goo-Gone soaks into the silicone of the device, and you’ll need hardcore solvents such as MEK8 (Methyl Ethyl Ketone is also carcinogenic) to remove the Goo-Gone. Residual Goo-Gone prevents the glue from setting up properly the next time you try to use the She-P (see footnote about learning things the hard way). I am not going to admit how many dives it took me to figure this out, but the inside of my drysuit got washed many times.
- After removing the glue, spray the She-P with 70% ethanol spray, letting it drip through the device. Rinse off the She-P with soap and water, then hang it up to dry. I made a little drying loop (Fig. 2) for the device with some bungee cord.
Fig. 2 The device can be hung to dry using supplies from around the house.
NEW FEATURES: SHE-P 3.0
The new She-P redesign features a compressed perineal section and an elongated anterior section. Users had commented on the device detaching from the front, and one user had even elongated her device with Aquaseal, so this is a great improvement. I personally had trimmed the perineal section since the original design was too long for my anatomy. The sides have been scalloped inwards to avoid sticking to the user’s thighs, which improves mobility in the water (especially for helicopter turns and backwards finning).
An extra She-P in your dive kit is just a good insurance. Photo by K. Egorov“RETROFITTING” THE ORIGINAL STYLE
My favorite modification is to approximate the new device by carefully cutting about 2 mm away from the sides of the original design. This allows for increased leg mobility (e.g., helicopter kicks) and keeps the device from unsticking as easily.
FINAL NOTES
Much-missed GUE diver Lynne Flaherty once said that if you’re on a live-aboard expedition, you can peel the device off and simply add more glue for the next dive, “but the device quickly becomes absolutely vile.” Run some non-greasy disinfectant
through the device after removal to avoid infection if you are skipping the glue-removal step.
In addition, I highly recommend purchasing a backup She-P. The device is durable and will last for many dives, but it may eventually develop small edge tears from use.
Also, consider adding a “p-valve connected” to the equipment check portion of the GUE EDGE mantra as you review your gear from head to toe. It is easy to get distracted while you are gearing up for a dive, and this is an easy thing to forget.
Finally, I recommend reading the posts on ScubaBoard and the She-P Facebook group that talk about the device. I hope you find this article helpful and have success using your She-P.
Author Bio
Julie Cerrato has been a GUE diver since 2015 and lives in San Diego. Currently, she works at a scuba shop and as a patent paralegal in the life sciences.
Photo credits
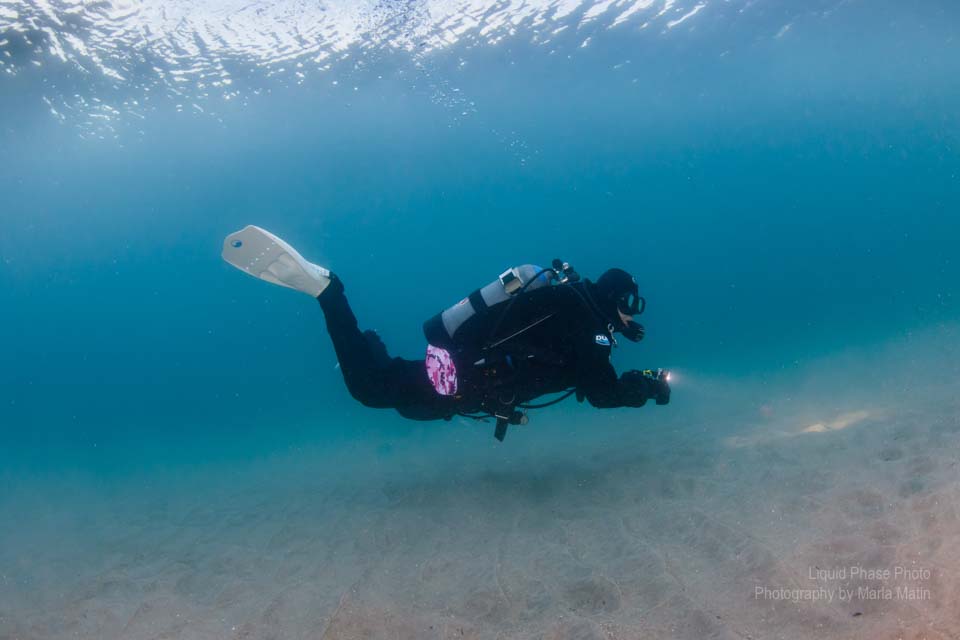
Photo on top is Julie Cerrato. Credits: Liquid Phase Photo by Marla Matin.
GUE Quest
This article was publised in the GUE Quest – January 2020 (Vol. 20, No. 4)



Leave A Comment